Imagine the warm, inviting glow of your wood flooring, free from dust and grime. Start with a high-quality microfiber dust mop for daily cleaning to keep that charm intact. Don’t forget to vacuum with a floor brush attachment to tackle those corners. Mats and rugs in high-traffic areas will prevent excessive wear.
Remember, maintaining the right indoor humidity levels is essential to prevent warping. But what happens when a simple mop isn’t enough?
Let’s discuss the steps for deep cleaning and ensuring your wood flooring remains as stunning as ever.
Key Takeaways
- Regularly dust and sweep using a microfiber dust mop to prevent grime buildup and preserve flooring integrity.
- Immediately wipe up spills and maintain indoor humidity to prevent water damage.
- Use pH-neutral or enzymatic cleaners to address various stains, testing solutions on hidden areas.
- Apply a high-quality sealant and use furniture pads to protect against moisture, scratches, and dents.
- Conduct deep cleaning sessions periodically, using microfiber cloths and minimal water to avoid warping.
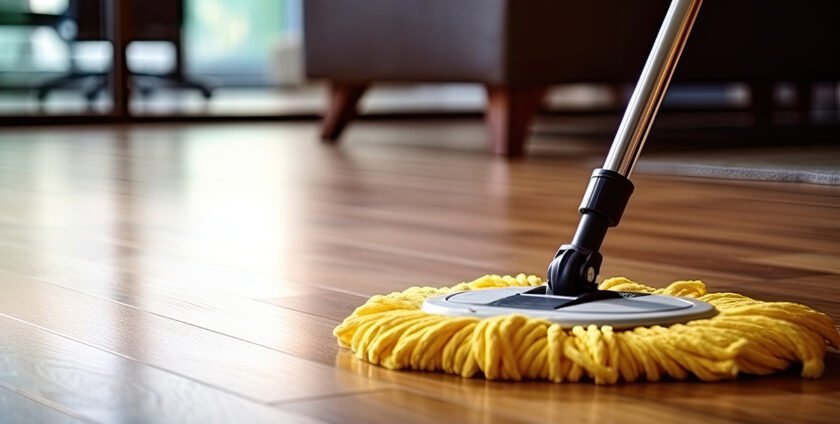
Daily Cleaning Routine
To maintain the pristine condition of your wood flooring, start your daily routine by sweeping with a microfiber dust mop to remove dirt and debris. Microfiber mops are superior because they trap fine particles, unlike traditional brooms that may push dust around. When choosing brooms, opt for those with soft, fine bristles to prevent scratching the wood surface. However, microfiber mops are generally more effective for daily maintenance.
First, select a high-quality microfiber mop with a removable, washable pad. These pads attract and capture dust, hair, and small particles, reducing the risk of scratches. Attach the pad securely to the mop head and glide it gently across the floor, overlapping your strokes to ensure thorough coverage. Avoid using excessive force, as this can damage the wood finish.
After sweeping, check the mop pad for accumulated debris. If necessary, shake out or replace the pad to maintain its effectiveness. For best results, wash the microfiber pads regularly according to the manufacturer’s instructions.
Weekly Maintenance Tips
For weekly maintenance, use a microfiber dust mop to capture fine particles and prevent abrasion on the wood surface.
Incorporate a thorough inspection for any spills or leaks, addressing them immediately to mitigate water damage.
Additionally, employ a vacuum with a floor-brush attachment to reach debris in crevices and under furniture.
Dusting and Sweeping Routine
A consistent dusting and sweeping routine is essential for preserving the integrity and appearance of your wood flooring. Start with the right dust mop selection. Opt for a microfiber dust mop, which effectively captures fine particles without scratching the surface. Avoid using brooms with stiff bristles, as they can damage the wood.
When sweeping, use methodical sweeping patterns to guarantee thorough coverage. Begin at one corner and systematically work across the room, overlapping each stroke slightly. This technique ensures no debris is left behind and prevents dirt accumulation in corners or along baseboards.
Regular maintenance is key to extending the lifespan of your wood flooring. Follow the steps outlined below for the best results:
| Task | Frequency |
|---|---|
| Dusting with microfiber | Daily or weekly |
| Sweeping patterns | Weekly |
| Checking for damage | Monthly |
Adhering to these practices will ensure your floor remains clean and free from abrasive particles that can wear down the finish. Remember, a weekly effort can save you from more intensive cleaning or repairs later.
Stick to this routine to keep your wood floors in pristine condition. You’ll enjoy their beauty and durability for years to come.
Preventing Water Damage
Prevent water damage by immediately wiping up spills and ensuring that no moisture is left to seep into the wood. Effective spill management is essential to maintaining the integrity of your wood flooring. Use a soft, absorbent cloth to blot any liquids, and follow up with a dry cloth to eliminate any remaining moisture.
Additionally, maintaining proper humidity control is important. Wood naturally expands and contracts with changing humidity levels, which can cause warping or cupping over time. Aim to keep indoor humidity between 30-50% using a dehumidifier or humidifier as needed.
Implement these weekly maintenance tips to safeguard your floors:
- Use mats and rugs: Place them in high-traffic areas and near entrances to absorb moisture and reduce dirt.
- Check for leaks: Regularly inspect plumbing and windows to prevent unnoticed water seepage.
- Seal gaps: Ensure all gaps between the wooden planks and around baseboards are properly sealed to avoid water infiltration.
- Avoid wet mopping: Stick to damp mopping with a well-wrung cloth to minimize water exposure.
- Monitor indoor humidity: Use a hygrometer to keep track of humidity levels and adjust accordingly.
Identifying and Treating Stains
To effectively manage wood floor stains, you must first identify the common types, such as water spots, oil-based stains, and pet accidents.
Use a pH-neutral cleaner for water spots and an enzymatic cleaner for organic stains like pet urine.
For stubborn oil-based stains, apply a solvent-based cleaner specifically designed for wood surfaces.
Common Stain Types
Understanding the common types of stains on wood flooring and their specific treatment methods is crucial for maintaining its pristine condition. Pet stains, food spills, and other common mishaps require distinct approaches to ensure your wood flooring remains undamaged and beautiful.
Pet Stains are often acidic and can cause discolouration if not addressed promptly. Blot the area with a cloth to absorb as much liquid as possible, then use a specialized wood floor cleaner to remove the stain.
Food Spills: Spills from items like wine, juice, or sauces can lead to sticky residues and potential staining. Quickly wiping the spill and using a damp cloth with mild detergent can prevent long-term damage.
Water Stains: These stains appear as dark spots caused by prolonged water exposure. Lightly sanding the affected area and refinishing it can usually restore the wood’s appearance.
Ink Stains: Ink can deeply penetrate wood fibres. To remove it carefully, use a fine steel wool pad and a small amount of mineral spirits.
Oil-Based Stains: Grease and oil require a different approach. Sprinkle baking soda on the stain to absorb the oil, then gently clean with a soft cloth and a wood-friendly cleaner.
Key Points:
- Blot, don’t rub
- Use appropriate cleaners
- Sand and refinish when necessary
- Act promptly
- Test solutions on hidden areas first
Effective Cleaning Solutions
Selecting the appropriate cleaning solutions for various wood floor stains guarantees effective removal without damaging the flooring’s finish. You need to identify the stain type and choose a suitable cleaner. For an eco-friendly approach, consider using natural cleaners like vinegar or baking soda, which are gentle yet effective.
Here’s a quick reference table for common stains and their corresponding cleaning solutions:
| Stain Type | Cleaning Solution | Application Method |
|---|---|---|
| Water Stains | Vinegar and Water | Create a paste, apply it to stain, scrub gently |
| Oil-based Stains | Baking Soda and Water | Create a paste, apply to stain, and scrub gently |
| Ink Stains | Rubbing Alcohol | Dab with cloth, rinse with water, dry thoroughly |
For water stains, mix equal parts of vinegar and water. Dampen a cloth with the solution, apply it to the stain, and then wipe dry. For oil-based stains, create a paste with baking soda and water. Apply the paste to the stain, scrub gently, and wipe off any residue. Ink stains can be treated with rubbing alcohol; dab a cloth with alcohol, apply it to the stain, then rinse with water and dry thoroughly.
Using eco-friendly products and natural cleaners safeguards your wood flooring and ensures a healthier home environment. Always test any cleaning solution on a small, inconspicuous area first.
Deep Cleaning Techniques
When deep cleaning wood flooring, start by vacuuming to remove all surface debris and dust that could scratch the finish.
Once the surface is clear, consider using a steam cleaner specifically designed for wood floors. Ensure the steam setting is low to avoid excess moisture, which can damage the wood.
Next, employ effective buffing methods to restore the floor’s natural shine and remove ingrained dirt. Use a buffer with a soft pad to gently work a wood-safe cleaning solution into the grain. This will help lift any remaining dirt and polish the surface.
To guarantee thoroughness, follow these steps:
- Test an inconspicuous area: Always verify the cleaning solution on a hidden section to ensure it doesn’t damage the finish.
- Follow the grain: When buffing, always move in the direction of the wood grain to maintain the integrity of the flooring.
- Use microfiber cloths: These are ideal for wiping away any residue without scratching the surface.
- Avoid excessive water: Wood floors can warp if too much water is used during cleaning.
- Regularly maintained: Periodic deep cleaning prevents grime buildup and extends the floor’s lifespan.
Protecting Wood Flooring
To safeguard wood flooring effectively, apply a high-quality, durable sealant that shields against moisture and wear. Choose a polyurethane finish for the best water damage and wear resistance, or consider an oil-based sealant for a more natural look. Make sure the sealant provides UV protection to prevent sun-induced discolouration and fading.
After sealing, focus on minimizing physical damage. Use furniture pads on the legs of chairs, tables, and other heavy items. These pads help distribute weight more evenly and prevent scratches and dents from forming on your floor’s surface. Install felt or rubber pads, which are more efficient at avoiding movement and protecting the wood.
Regularly clean the pads to remove grit and debris that can cause abrasions. Additionally, area rugs should be used in high-traffic zones to reduce wear and tear further. Ensure the rugs have a non-slip backing that is suitable for wood floors.
Handling Scratches and Dents
Address minor scratches on your wood flooring using a wood filler stick that matches the floor’s colour. This guarantees a seamless blend for an undetectable repair.
Clean the scratched area with a soft cloth to remove dust and debris. Next, apply the wood filler stick directly to the scratch, pressing firmly to fill the groove. Use a plastic scraper or credit card to level the filler, removing excess material. Allow it to dry according to the manufacturer’s instructions.
For deeper dents and more significant damage, you might need to resort to sanding repairs. Begin by lightly sanding the affected area with fine-grit sandpaper, working with the grain of the wood. Be careful not to sand too aggressively, which can create uneven surfaces.
Once the area is smooth, clean away the sanding dust and apply a wood filler compound to the dent. After the filler dries, sand the area again to ensure a smooth finish before applying a matching stain or sealant.
Here’s a quick checklist to remember:
- Clean the area thoroughly before any repairs.
- Choose filler sticks that match your floor’s colour.
- Use fine-grit sandpaper for minimal surface disruption.
- Apply filler compounds for deeper dents.
- Finish with a matching stain or sealant for a polished look.
Conclusion
You have the tools and tips for maintaining and deep cleaning your wood flooring. By incorporating these practices, like using a high-quality microfiber dust mop daily, your floors can remain pristine.
For instance, Sarah found that regularly checking humidity levels and placing mats in high-traffic areas kept her oak floors looking new.
Remember, the key is consistency. Regular deep cleaning and prompt stain treatment will guarantee your wood flooring remains a lasting and beautiful home feature.
- By: Martin Allen
- Category: Wood Flooring
- 0 comment
Leave a Reply